So browsing the internet to find advice on creating seamless/tileable textures and stumbled across a free stock image website for use for artists. www.cgtextures.com I quickly found a variety of desirable and useful textures that suited the materials that Chinese used.
The Chinese use compressed earth to create their non load bearing walls, although the texturing website contained no mud wall textures, I found that the plaster section of the website supplied me with a variety of similar white washed walls that were useful.
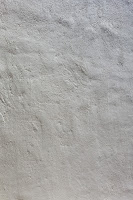 |
| White Plaster texture |
Tonal values of the texture need to be consistent along the image, to create this consistency, I was advised to desaturate the image and then add a luminosity layer and change the high pass levels to create a texture with consistent tones.
The patch tool I found was the most useful tool for removing obvious features on the texture, the spot healing bush was also a handy tool and does similar actions, but you lose sharpness quality when it does it's calculations.
Here is the final tileable texture, there is 4 textures there and I find it hard to notice the seams on the edges of the image, which is exactly what I was aiming to produce. I then took this texture and created a makeshift wall plane in 3ds Max to demonstrate the tileable texture on a game object. Below is the textured plane.


As well as creating a diffuse texture for the plane, I also began exploring the use of normal maps to add more detail to the surface, I have used this technique before and it gave a much more detailed effect with near minimal effort. The Nvidia Normal map filter for Adobe Photoshop was used to create this normal map below, this Is a quick and easy way to produce a detailed normal map, but there are other ways that normal maps can be achieved.
.png)
Links
Tileable textures and how to construct them:
No comments:
Post a Comment