Saturday, 21 December 2013

Asset list and drawings

Hello there world, I have been doing some drawing of the sort of buildings I wish to create within my village and i've found it extremely time consuming and I may of over scoped this part of the time line. Currently I have only one building drawn out in a basic isometric form to build upon the advice given to me to make all blocks and items fit one block. Here below is the drawing I've completed to help guide me into choosing the assets and create the asset list. The asset list may be quite large but a lot more buildings can be built from this kit if they were made.


From the isometric drawing, here is a snippet of all the pieces I would need to create to make this model. This list will most definitely expand as I would like a slight variation in my buildings.


Hopefully I can get the next set of buildings done very soon to add to this list. Although you have to remember that a Chinese house can be made up of many buildings put together so this may seem like a large amount of assets for a building, or maybe I'm not dividing it up enough yet.

Saturday, 14 December 2013

Basic map design of village

Based on my research here is a simple top down view of the style of map and layout of the village I would make, although this wont be the final design, it is a taster as to the style of orientation and organisation of the houses I hope to aim for. All the main entrances facing south to keep away from the North winds, tight and close structures with small alleyways. I hope to design a few more in the next two days.

Wednesday, 11 December 2013

Miscellaneous inspiration of various chinese buildings for top down map

As I am now currently trying to sketch down a few drawings of top down maps of my eventual village layout, I searched on the internet for some images to get me in the right mood or to create a 'mood pallet' to aid my drawing, as this always seems to help me. There were a few images I found very useful and that gave me inspiration. I started by looking at google maps to see if I could see any older districts fo China to get a style of layout of some buildings to give me some foundations but I foudn that China is very secretive about showing off their countrys map to the West.

Here are some of the pictures I found inspiring and helpful whilst drawing down top down maps, although some of the pictures don't have the same features of the Sui-Tang dynasty, they still do have some similar aesthetics.


A man climbs down a ladder after sweeping dust from atop the entrance to his small residence in a "hutong", (or small alley in Chinese) in central Beijing, on April 22, 2011. Doorways leading to "hutongs" and their "siheyuan" (or small courtyard houses in Chinese) once criss-crossed the city, but they are quickly disappearing with Beijing's fast evolution into a modern metropolis. (Reuters/David Gray)
 
Interior view of an earth building located at Chuxi Village, Xiayang town, Yongding county, in east China's Fujian Province. There are about 30,000 earth buildings, dating mostly from the Ming (1368-1644) and Qing (1644-1911) dynasties, in the Fujian Province, southern and eastern China. (Reuters/Kin Cheung)
 
A Chinese man paints the scenery while a villager rows a wooden boat passing by some of the Ming Dynasty's ancient buildings built along a river in Xitang, Jiashan County, Zhejiang Province, on May 16, 2011. (AP Photo/Andy Wong)
 
Ethnic Dong minority villagers walk through a covered bridge on their way to a Kam Grand Choir gathering in Tongguan village of Liping county, Guizhou province, on October 17, 2011. (Reuters/Sheng Li)
All these images were found off of a collection of new an old Chinese Architecture blog, the blog can be seen below

Links:


Chinese Architecture Blog
http://www.theatlantic.com/infocus/2012/11/chinese-architecture-old-and-new/100409/

Saturday, 7 December 2013

Updated Dissertation timeline

Since the project proposal feedback, i've been slipping behind on the timeline and on my workflow progress; this was because I did for see the fact that I would have so much to work on from the feedback and also the time it takes for this extensive research to take place. I now wish to produce a more updated and realistic time line to construct around my time and to produce the best dissertation possible.

Project Timeline:

2nd November - Finish draft and hand in final dissertation proposal before the 4th of November

25th November – Complete any touch up research that I receive from the dissertation proposal, so that the following months work is much smoother.
 
9th December – Research into one dynasty of the Chinese culture and choose the style of village I want to create. Begin to draw top down layout designs on how I would like buildings to look and be orientated.

16th December - Decide on scale and size of the models as well as to construct an asset list of what will need to be modelled. Complete individual drawings of the general look of each model to aid in the construction of the models.

30th December – Begin to model each asset without unwrapping UVW’s. Test scale and size in UDK where possible. Assemble a basic grey box area of the modular assets to see them all together to test scale an size.

17th February – Continue modelling if needed and start UVW unwrapping on each asset ready for texturing. (May take longer as not as experienced in UVW unwrapping, although research into quicker uvw mapping will be undertaken over the course of the project.)

10th March – Experiment with Mudbox/Zbrush and the NvidiaNormal filter in Photoshop in texturing the assets with diffuse specular and Normals.

24th March – Import and construct the Village within UDK with textures and assets.

7th April – touch up and add more details to models where needed or where some models issue are found. If no issues are found or are ironed out and total polygon count allows (45k polygons). Create a couple more assets to add a more realistic atmosphere to the scene such as trees, pots and tiles.

 7th April - 15th May – Work on finalising dissertation

 17th May – 16th May to be the absolute deadline of handing in dissertation.

Monday, 2 December 2013

Tileable textures

To construct my own models I have usually taken textures from royalty free stock image websites and plonked them in Photoshop, and then using manipulation tools on the texture for the asset. This technique has served me well creating individual assets however I've never needed to make a texture that needs to be tileable and seamless for modular assets, this is nearly a necessity when using assets which can touch each other or be very close and still be the same material.

So browsing the internet to find advice on creating seamless/tileable textures and stumbled across a free stock image website for use for artists. www.cgtextures.com I quickly found a variety of desirable and useful textures that suited the materials that Chinese used.

The Chinese use compressed earth to create their non load bearing walls, although the texturing website contained no mud wall textures, I found that the plaster section of the website supplied me with a variety of similar white washed walls that were useful.


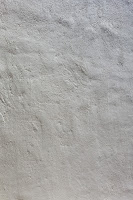
White Plaster texture
From the advice I have found on line, it was clear to me that one of the most important features of a tileable texture is to reduce or choose a texture without many obvious features.

Tonal values of the texture need to be consistent along the image, to create this consistency, I was advised to desaturate the image and then add a luminosity layer and change the high pass levels to create a texture with consistent tones.

The patch tool I found was the most useful tool for removing obvious features on the texture, the spot healing bush was also a handy tool and does similar actions, but you lose sharpness quality when it does it's calculations.


Here is the final tileable texture, there is 4 textures there and I find it hard to notice the seams on the edges of the image, which is exactly what I was aiming to produce. I then took this texture and created a makeshift wall plane in 3ds Max to demonstrate the tileable texture on a game object. Below is the textured plane. 


As well as creating a diffuse texture for the plane, I also began exploring the use of normal maps to add more detail to the surface, I have used this technique before and it gave a much more detailed effect with near minimal effort. The Nvidia Normal map filter for Adobe Photoshop was used to create this normal map below, this Is a quick and easy way to produce a detailed normal map, but there are other ways that normal maps can be achieved.


Links
Tileable textures and how to construct them:

Thursday, 28 November 2013

Building Materials

As the time line suggests, by now I should have chosen a Dynasty and drawn a few concepts of what my village arrangement could be like as a final set of assets, however due to the amount of feedback I received and work that needed to be done to get up to speed with refining my dissertation, I have pushed the time line back a week to fit in some more posts about textures and materials.

I was advised to look more into texturing as the textures are very important when considering modular components can be tiled and placed along side each other. With this in mind, creating seamless textures is going to be a priority, however before attempting to create some of my own I would like to also research into materials from Chinese architecture as to get some practise for the real thing later on in the project.

 The Chinese used a lot of wood in their structures and also later on some stone, however it was mostly pressed earth and wood. But why did they chose to use wood over the stone? Stone as they would have known was always to last longer. The wood has environmental issues such as weathering  fire hazard and insect damage, however they still chose to build with wood materials, but why?

"Wooden buildings last long enough for more than several generations to live under, but not long enough to become part of archaeological excavations. Buildings were made to be lived under, they weren't made to last thousands of years solely for our benefit. Those that were built to last, such as tombs, did last."

Finding that the structures are made of wood was easy, however all books and websites seem to only suggest wood and not any particular type of wood. However after an hour, I found a website which gave a hint as to what wood was used and why. This wood was White Cedar or also know as Melia azedarach, or even Chinaberry tree. This tree is often found in southeast Asia and produces toxic berries but is mainly used for it's timber, the wood is of medium density and varies colours from light brown to dark red. The seasoning process of the 'Chinaberry' tree is relatively simple as the planks dry without cracking and also have a resistance to fungal infection. This would mean that having huge cracks within the texture isn't required.

Melia Azedarach/White Cedar/ Chinaberry
Small texture file of dark wood


Photograph courtesy of Ronald G. Knapp
1987, Shifuxiang, Zhejiang Province


Tiles are a consistent part of Chinese architecture and keeps the insides of the construction dry, the materials used is clay from the earth, however they use a special construction method to make these which I found that will also help me with my model tile construction.

To the right you can see a woman rolling clay out to the dimensions of the block on the floor, this gives the tile a relatively manageable shape with the tile creation.


Photograph courtesy of Ronald G. Knapp
1987, Li village, Jiande xian, Zhejiang Province


The clay is then rolled over a 'pot' like shape with the makers markings on them, after it has dried it is removed and separated into quarters, which must mean the angle that a tile must be is 45 degrees. It is the fired and painted if necessary.


The walls of the buildings are not load bearing walls and so are made with compacted earth which is then painted white to protect the earth from insects and also weather. I also found that the flooring is made of large slabs of stone from the mountains, From this research I can then find materials that will be needed and create some tileable textures for practise.

Links:


Describes the wood used as White Cedar:
http://www.designboom.com/architecture/the-art-of-timber-construction-chinese-architectural-models/

Chinaberry pictures:
http://www.delange.org/ChinaBerry/ChinaBerry.htm

Clay tile creation:
http://depts.washington.edu/chinaciv/3artile.htm#tile3

Darkwood creation:
http://www.tutorialchip.com/freebies/showcase-of-high-resolution-dark-wood-texture-designs/

Monday, 18 November 2013

Increasing my markable limitations (Polycount and textures)


As feedback I have received a suggestion to research into polygon total and give myself a budget to work with throughout the modelling process. This would have to consider the game engine I will work within (UDK) and also it's limitations in terms of exporting and also texture creation restrictions.

To begin I will by talking about texture limits, from past experience I have found that UDK will only accept textures that are created in 8 bit mode on Adobe Photoshop, this however is not a problem and but a small tweak on the texture creation process. Without doing this, the program appears to crash and close as the texture import process begins, I must avoid this to not waste time. Also upon researching game design forums I have found that UDK will only accept textures in powers of 2, this is also a good habit to get into as other game engines will have the same principle. So 256 x 256, 512 x 512, 1024 x 1024, 2048 x 2048 and 4096 x 4096 are acceptable, however I don't plan to be using the last suggestion as these are considered texture sizes for 'hero' models or player model textures..

"General textures for Static Meshes and CSG Surfaces should still be only 512x512 or 1024x1024 in most cases, with only high detailed textures being at 2048x2048, and that is it."

With this information I have decided that the maximum texture size I will use for my individual modular pieces will be 1024 x 1024 pixels, the models I'm making are not 'hero' pieces and wont need incredible texture quality, also the texture will need to be tile able as the models I'm producing will need to be seamless in texture when positioned next to each other, because of this I cant have a piece of detail that stands out on the textures or the player will see that it is easily tile able.

From a mock up model I created a few weeks ago (see previous posts) I constructed a small section of a Chinese building to get used to the Dougong building method. From this I found that the building was 10k polygons, however there are methods that I could of used to reduce the total poly count size. I was also given advice by my lecturer of how I could split up my model to reduce the poly count in terms of each model, doing this would help dramatically to individual pieces, but not the overall kit that I will be creating. This poly count is very high for what I want to create, however I am aiming to build a model that is architecturally as accurate as possible without loss of detail due to poly count size. From researching into poly count and experimenting in 3dsmax, I hope to build my whole kit to be under 45k polygons, although I would prefer to work at a higher polygon limit, this is for a game engine so it will need to be optimised as such and thus a limitation is needed to be put in place.

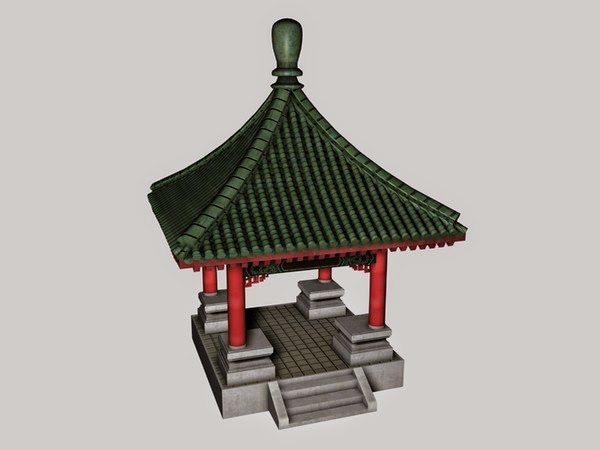
A small Pagoda I found online

Links

http://www.polycount.com/forum/showthread.php?t=99738

http://www.turbosquid.com/3d-models/pagoda-chinese-3d-model/392786